

Last week when I shared my post on Owen’s dresser, I told you I would share my staining process with you later, and you’ve all undoubtedly been on the edge of your seats ever since, right? Right?? Well, even if you haven’t been, today’s your lucky day. I’m here to teach you all about my 2 step staining process.
I don’t always use this process, but I’ve found that if I want to add depth or character to a piece, this is a great way to do it. Sometimes I think it can look too flat when you only use one stain, so this is how I add some dimension. Also, if you’re a fan of subtle distressing or a refined rustic look, this is a great way to achieve that. It allows you to do some distressing without having such a stark difference between the dark finish and the light wood, which you reveal when you sand. Does that make sense? Hopefully it will soon.
2 Step Staining
(I actually realized that this process is more than two simple steps, so sorry for the misleading title…)
Step 1: Find a scrap piece of wood to test on
It’s always, always a good idea to test your stain on a scrap piece first. Stain finishes can vary based upon so many factors, from the amount of time you let it penetrate to the type of application method you use, but in my opinion, the biggest factor in how your finish looks will be the type of wood you stain on.
Step 2: Start with a wood conditioner
Especially if you’re using a softwood (softwoods include pine, cedar, and fir. Find a great list of hardwoods and softwoods here), you’ll want to use a wood conditioner. Softwoods tend to have a hard time taking the stain evenly, and using a wood conditioner or pre-stain can help with that issue.
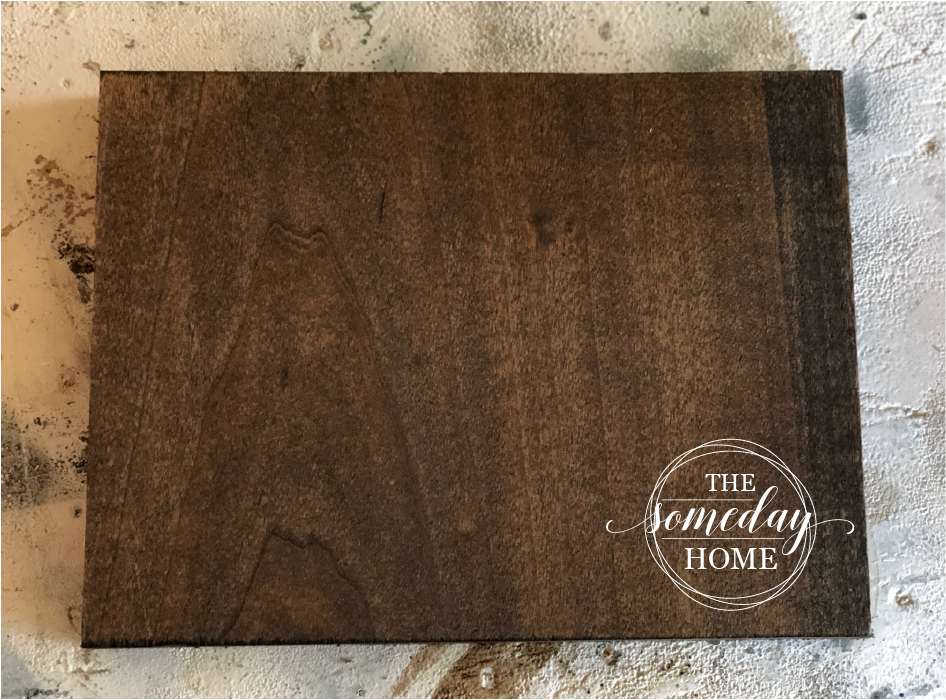
Step 3: Stain with your base color
Depending upon my desired final result, I usually like to use my darker or more overpowering stain first. If you use your lighter stain first, it gets mostly covered by your darker stain, making a 2 step process pretty much pointless. For Owen’s dresser, I used Espresso by Minwax for my first stain.
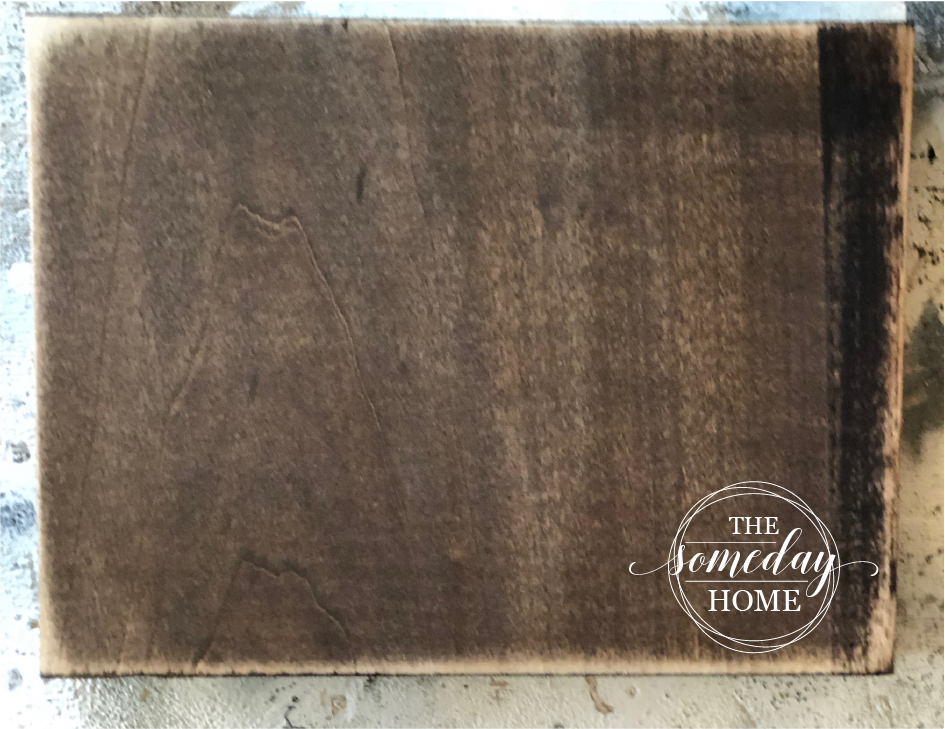
Step 4: Lightly sand
Once your base stain has completely penetrated and dried (I recommend at least 24 hours, but ideally 48), take a fine-grit sandpaper to it. Your overall goal is really what will determine how much and where you sand. If you simply want to add dimension but no distressing, sand very lightly (by hand with a sanding block, ideally) with a 320 grit sandpaper.
If you want some distressing, you can use 220 or 240 grit sandpaper to take off a little more of the top layer. You’ll want to do a little extra sanding on the corners and edges, and anywhere that natural wear would occur over time (think around handles, at the bottom of legs, etc.). I still like to finish with a really light once-over with 320 grit after this, just to even everything up.
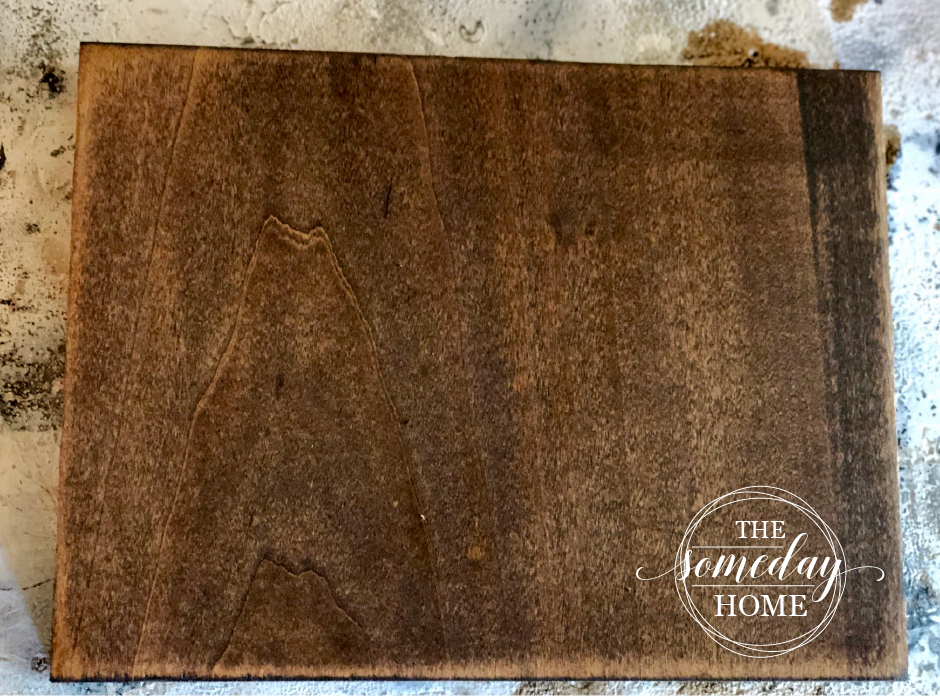
Step 5: Stain with your second color
I use my lighter color for my second coat. Again, depending upon my desired final outcome, I might choose a stain just a few shades lighter than my dark stain, or I might choose something drastically lighter. I didn’t want the distressing to look too drastic on Owen’s dresser, so I used Early American by Minwax. It’s a trusty, middle-of-the-road tone that you just can’t go wrong with. It’s not too light and not too dark.
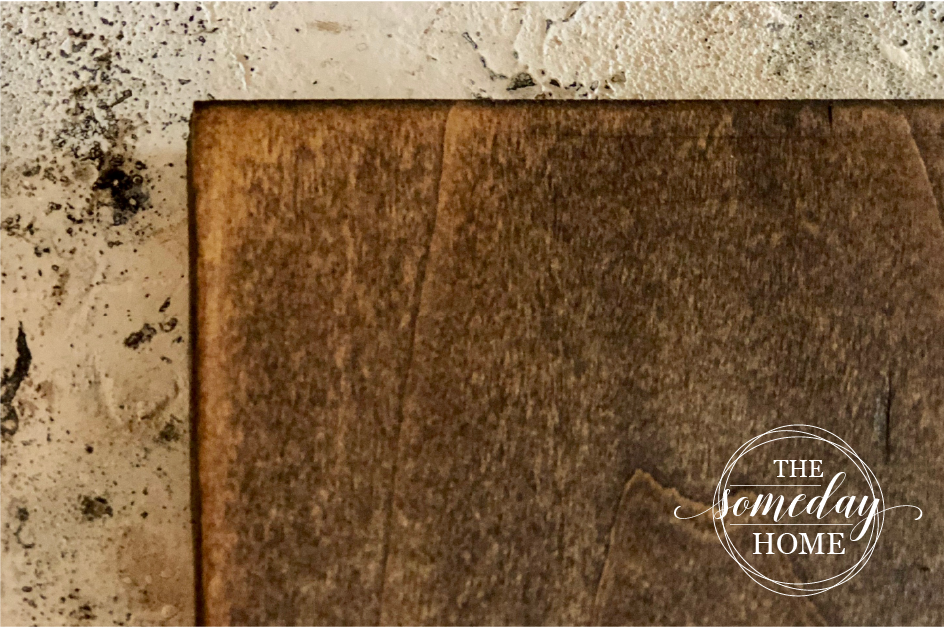
You’ll notice when you go over your dark stain with your lighter stain that the areas that pick up most of the new color are going to be areas that you sanded the most. It also adds just a hint of brightness to the darker areas.
Step 6: (Optional) Repeat step 5, or add a poly coat
After letting your piece dry for at least 24-48 hours, you can decide if you want to repeat step 5, or if you’re ready to poly. Ya’ll already know what I’m going to tell you here… if you’re ready to polyurethane, you’ve got to check this out!
And that’s pretty much it! If you use this method, I hope you’ll let me know. Leave a photo in the comments, or share it with us all on my facebook page.